
First project and first trace
After installation, open Perseval and continue below.
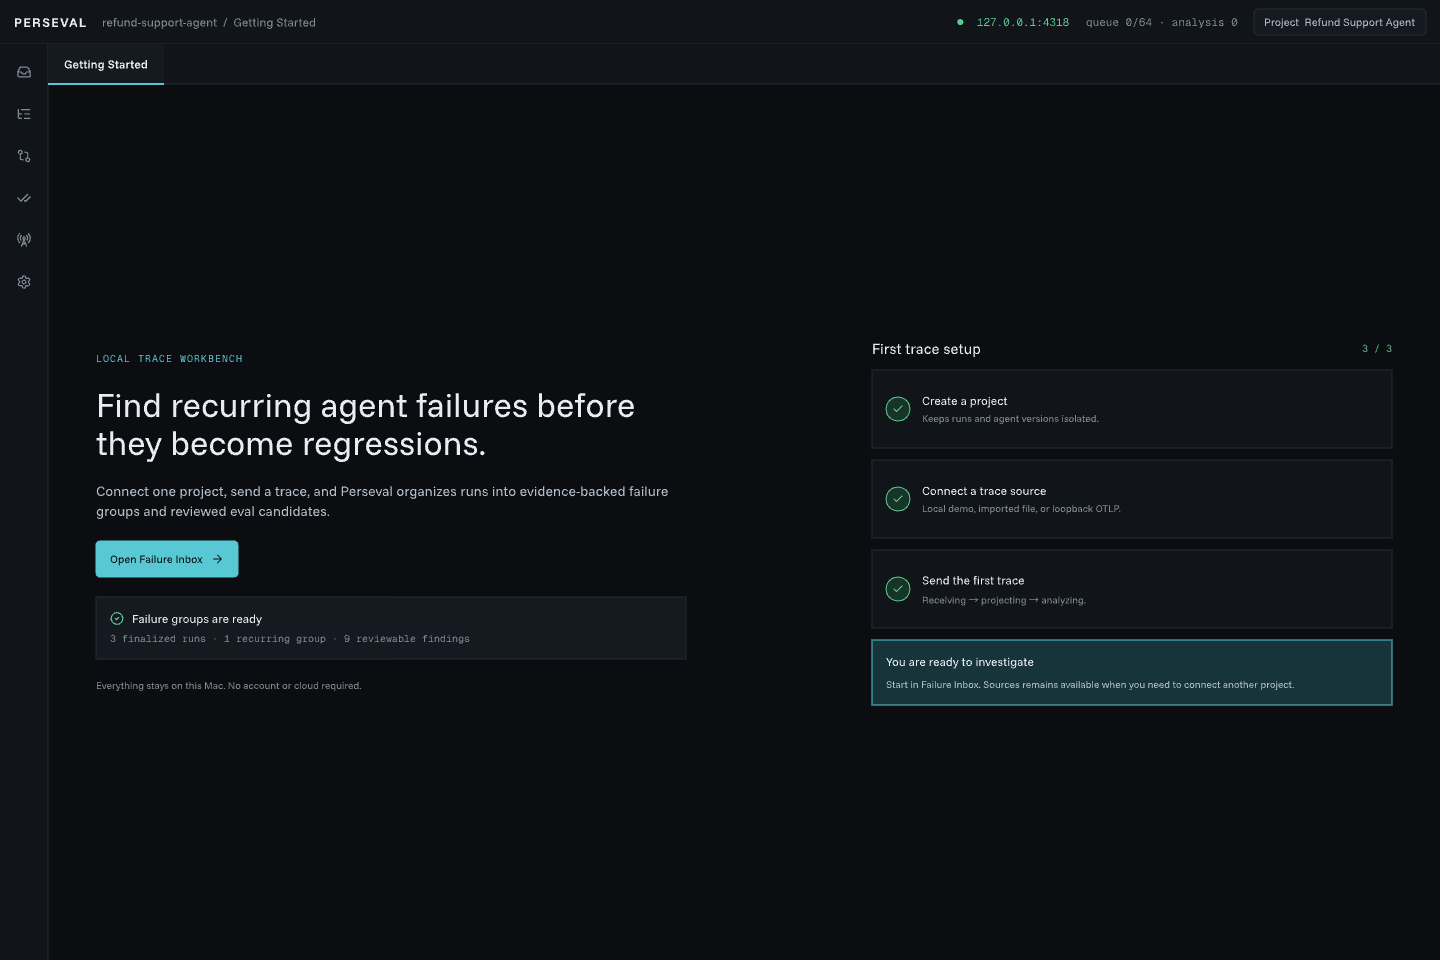
Getting Started stays useful after setup: it confirms the selected project, receiver state, and first analyzed trace.
1. Create a project
Section titled “1. Create a project”Open Perseval and choose Create project. Use one project for one agent application or repository. Environments, builds, sessions, runs, and revisions remain dimensions inside that project.
A useful name is specific but stable, such as Checkout Agent or Release Verification Agent. Perseval creates a path-safe project ID and shows it in Sources.
If you want to explore before instrumenting anything, choose Load local demo. The demo creates planner, browser, and verifier traces with a repeated failure group and never opens a network listener.
2. Enable OTLP
Section titled “2. Enable OTLP”Open Settings → Collection, enable OTLP/HTTP receiver, and save. Receiver ownership changes on restart, so quit and reopen Perseval when prompted.
Open Sources and verify that the receiver says Listening. Copy both values shown there:
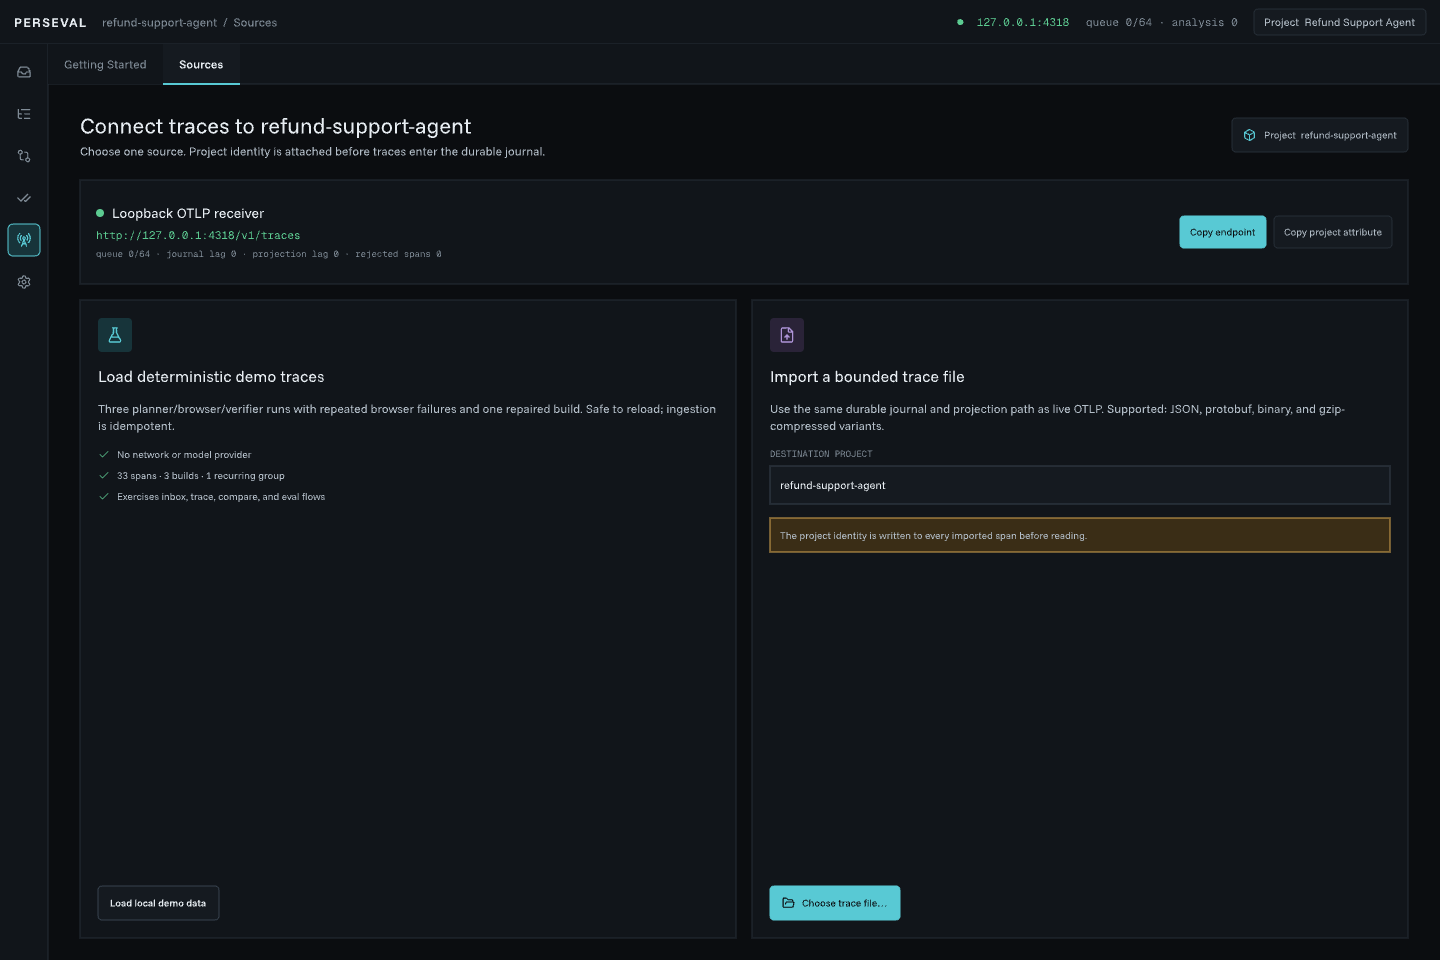
- the effective endpoint, for example
http://127.0.0.1:4318/v1/traces; - the project resource attribute, for example
perseval.project.id=checkout-agent.
If the default port is occupied, Perseval chooses another loopback port and keeps the workbench open. Always copy the displayed endpoint instead of assuming 4318.
3. Configure your exporter
Section titled “3. Configure your exporter”Point the agent’s OpenTelemetry exporter at the endpoint shown by Sources. Many SDKs accept environment configuration like this:
OTEL_TRACES_EXPORTER=otlp \OTEL_EXPORTER_OTLP_ENDPOINT=http://127.0.0.1:4318 \OTEL_RESOURCE_ATTRIBUTES='perseval.project.id=checkout-agent,service.name=checkout-agent,service.version=dev-1' \your-agent-commandSome SDKs append /v1/traces automatically when given the base endpoint; others require the full endpoint. Follow your SDK’s OTLP/HTTP exporter behavior and confirm the effective request path in Sources.
4. Give the run an identity
Section titled “4. Give the run an identity”At minimum, include:
perseval.project.id = checkout-agentservice.name = checkout-agentservice.version = dev-1gen_ai.conversation.id = local-debug-session-1For a multi-agent run, add gen_ai.agent.id and agent.role to each agent span. Continue with the agent telemetry contract before relying on deterministic failure detection.
5. Watch ingestion and finalization
Section titled “5. Watch ingestion and finalization”Run your agent once. Sources should show live runs and queue, journal, projection, and analysis counters. Runs displays the trace as it arrives.
After 30 seconds without committed activity, the revision becomes Quiescent. After a further 5-second grace period, it becomes Finalized and enters deterministic analysis. A late span creates a Reopened revision instead of changing immutable finalized evidence.
Zero queue or journal lag means collection caught up; it does not by itself mean analysis is complete. Wait for the lifecycle and analysis state shown in the interface.
6. Open the result
Section titled “6. Open the result”- If the run has a finding, open Failure Inbox, select the group, and inspect a concrete example.
- If the run has error spans but no finding, open it from Runs, select the error span, and read the Finding inspector. Perseval names the missing behavioral facts and links you to raw Attributes.
- If the run is absent, use Troubleshooting.
Optional: load all documented scenarios
Section titled “Optional: load all documented scenarios”Download the sanitized fixture runner, then use the full endpoint and project ID copied from Sources:
python3 perseval-agent-scenarios.py \ --endpoint http://127.0.0.1:4318/v1/traces \ --project checkout-agent \ --scenario allThe five scenarios cover an uncertain mutation, an optional recovered error, a multi-agent SpanLink handoff, a baseline/repaired pair, and an error-only run with missing behavioral facts. Read the fixture expectations before investigating them.
Add --occurrences 3 to create three distinct runs per selected scenario. This is useful for recurrence trends and Investigation’s Previous/Next controls. Without that option, identities stay stable by design, so sending the same scenario again exercises deduplication and late-span reopening.
Expected outcome
Section titled “Expected outcome”You now have a durable project, one finalized run, explicit project/build/session identity, and a path into either a failure investigation or telemetry-gap repair. Next, learn how Perseval separates these identities in Workspaces and identity.